
How Can Homeowners Clean and Inspect Their Dryer Ducts Step by Step?
- John@LiteHouse

- Aug 28
- 3 min read
Did you know that your innocent-looking dryer could be harboring a dangerous secret? Most of these fires are completely preventable with regular dryer-duct cleaning and inspection. You don't need to be a professional to keep your family safe; just a homeowner who's willing to spend a few hours twice a year on this critical maintenance task.

Essential Tools for DIY Dryer-Duct Cleaning
Before you start, gather these tools to make the job easier and more effective:
• Dryer vent cleaning kit (available at most hardware stores for $20-30)
• Shop vacuum or regular vacuum with hose attachment
• Screwdriver set (usually Phillips head)
• Flashlight or headlamp for better visibility
• Work gloves to protect your hands
• Drop cloths or old towels to protect your floors
• Measuring tape to check vent length
Professional tip: investing in a good dryer vent cleaning brush with extension rods will make this job much more manageable, especially for longer vent runs.
Step-by-Step Dryer-Duct Cleaning Process
Step 1: Safety First; Disconnect Everything
Start by unplugging your dryer from the electrical outlet. If you have a gas dryer, turn off the gas supply valve as well. This isn't just about safety; it's about protecting your equipment from accidental damage.
Move your dryer away from the wall carefully. You'll need enough space to access the back of the unit and the ductwork. Don't rush this step; dryers are heavy, and the connections can be delicate.
Step 2: Disconnect the Vent Hose
Look for the aluminum vent hose connecting your dryer to the wall. Remove any worm drive clamps or metal tape to free the vent pipe from the dryer. Please do the same on the other side of the duct where it meets the wall or window.
You might be surprised by the amount of lint that falls out immediately. This is normal but also a clear sign that cleaning was overdue.
Step 3: Clean the Interior Ductwork
Use a dryer vent cleaning brush to break up the clog. These tools typically consist of a multi-sided brush and an extension pole. Some brushes can be used with a drill.
Insert your cleaning brush into the ductwork and work it back and forth. You'll feel resistance when you hit lint buildup; be patient and work through it systematically. Use your vacuum to remove loose debris as you go.
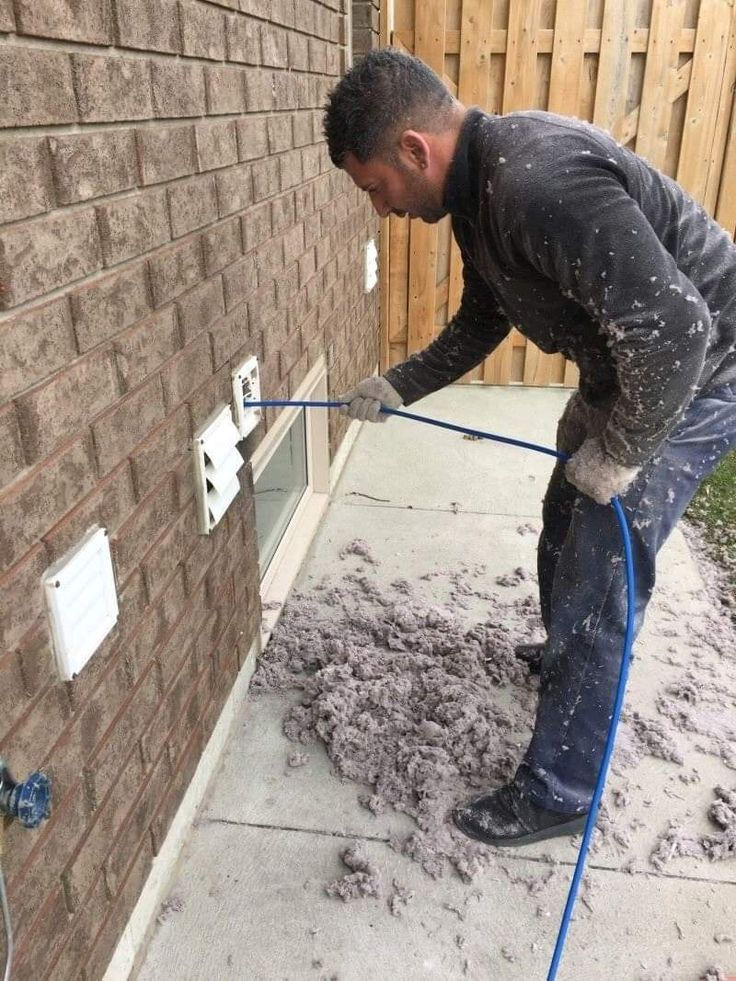
Step 4: Don't Forget the Exterior Vent
Head outside to find your dryer's exterior vent. Remove the vent cover from the exterior of your home. Using your dryer cleaning brush, wipe away dust from the ductwork, and use a vacuum with a hose to clear out any remaining debris.
Check that the exterior vent flap opens and closes properly. If it's stuck or damaged, replace it; proper airflow is crucial for safe operation.
Step 5: Inspect and Reassemble
Before reconnecting everything, take a moment to inspect your ductwork. Look for:
● Damaged or disconnected sections
● Excessive bends or kinks
● Signs of moisture or rust
● Proper connections and seals
Red Flags That Require Professional Attention
While DIY dryer-duct cleaning handles most situations, some circumstances require professional expertise. Call a professional if you notice:
● Ductwork damage that needs repair
● Vents longer than 25 feet or with multiple bends
● Signs of animal nests or extensive debris
● Persistent moisture issues or mold growth
● Ductwork that's difficult to access
Systems used more rigorously, or those with longer vents, might need cleaning every 6 to 9 months to maintain efficiency and safety.


Comments